Thursday, May 27, 2010

Cupcake 32

This week I stumbled on the most fantastic Cupcake site called Ming Makes Cupcakes. Cupcake 32 is also known as Graham Cupcake with Key Lime Cream Cheese Frosting.

graham cupcake with Key Lime Cream Cheese Frosting

Graham Cupcakes with Key Lime Cream Cheese Frosting

CUPCAKES
1 cup flour
1/2 cup graham cracker crumbs
1 1/2 tsp baking powder
1/4 tsp salt
1 stick butter, room temperature
1 cup sugar
2 eggs
1/2 tsp vanilla
1/2 cup milk

Mix flour, graham cracker crumbs, baking powder, and salt. Beat in butter gradually. Beat in sugar and mix thoroughly. Beat in eggs, then vanilla and milk until just mixed. Pour into lined cupcake pan. Bake at 400 for 20 minutes, or until toothpick comes out almost clean.

FROSTING
4 oz. cream cheese, room temperature
1/2 stick butter, room temperature
2 cups confectioner's sugar
2 T key lime juice

Mix together ingredients with an electric mixer until smooth and creamy. Frost cupcakes. Top with a lime slice and a sprinkle of crumbs.


Cupcake 32
Now I do not know what Ming's story is but he makes some amazing looking cupcakes. Instead of a lime slice I used a Trader Joe's key lime gum drop to top the cupcake. I have only tasted the raw batter...yummmmmm and the frosting.....well I can barely stay awake to write this from the intense sugar crash I am experiencing. In fact, I just found some dried icing on my chin and I have powdered sugar all over my shirt so I must look a sight.

The recipe makes a perfect dozen and loads of frosting. There is extra frosting, so what can I throw that on top of this weekend? Hmmmmm. This dozen is going to SnB with me tonight, so hopefully they turned out yummy.

Monday, May 24, 2010

Coming at it from both ends

There was a time earlier this year when I was having a really tough time finding joy in knitting.

GASP! I know. Never did I think that would happen. I mean, knitting is my happy place. Playing with sticks and string brings me JOY...

but...

Every project had lost its appeal. Total dullsville. In a willy nilly search for new projects I would cast on and still be unenthusiastic or I couldn't get gauge with the yarn at hand. One week I desperately cast on for three or four new projects in the hopes that one would renew my prior fervor but all it did was leave me feeling more frustrated and unmotivated. This was serious. This was a knitting depression.

This was not going to do. I needed my happy place back so I had to figure this out. After acknowledging that this was a significant problem, I gave my self a clean slate. Yep, permission to clear the mind, the ravelry queue, the ubiquitous stash and start fresh. Both the clearing the rav queue and stash are meant figuratively, of course. But does anyone else feel the pressure of their ravelry queue? 200+ projects all lined up for a rainy year or decade. Do you feel the pressure of using your stash in order not to be the next hoarder on Hoarders? Because stashing is just one more skein away from hoarding when your closets and garage are bursting with yarn already. Too much pressure from your hobby/love/joy really isn't about that specific thing exactly...at least in my case, it was just a manifestation of other pressures that were happening in my life. But when bad things start popping up in your happy place, it is time to take action. Therefore, it was time for a fresh start.

The next thing I did was rededicate myself to the process of knitting and not the end product. It was time to start enjoying the journey and stop and smell the yarn once in a while. Sometimes I just want to wear the shawl or get the gift made in time or knit without thinking and I am jonesing for the rush of the bind off of the finished project. There is it. Attachment to the finished object. All the bumps, foibles, dropped stitches, following patterns, and crappy inexact gauges were giving me grief and standing in my way of said FO! Writing this I realize that I had gotten in a very bad habit of not wanting to think at all while knitting. I just wanted to float along on a row of stitches without engaging in the process. Escapist knitting, if you will. This worked well for me while finishing my dissertation. During those last few months, I made scarves which was all I could manage in the few stolen moments of knitting at the time. Now I had the mindless knitting habit, which was not working for the things more complicated than a scarf. It was time to reignite the flame of process and study the quirks of the journey and maybe learn something new. Whoa, what a concept.

Lastly, I asked myself what I wanted in a project and the answer was a simple cardigan. With this cardigan, my hopes were to engage in the process of constructing a sweater so that in the future I will be able to adapt/alter/make sense of other patterns in regards to my body. Also, I wanted a sweater I could wear all the time. A go-to sweater.

The easy top down raglan by Cosmicpluto aka Laura Chau was a good place to start.
top down cardigan ex
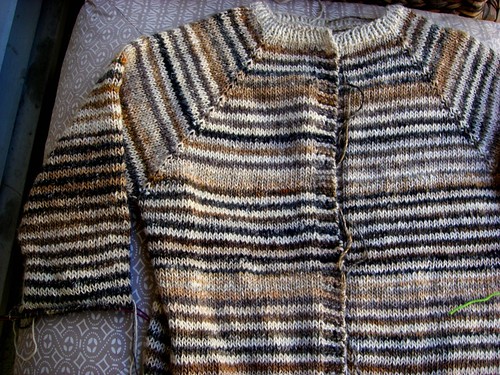
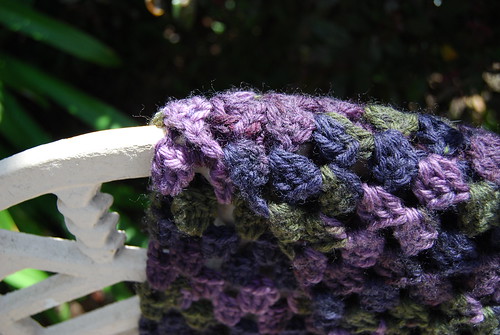
My general inclination towards yarn is the bright and colorful, but in an everyday sweater you really need something a little more neutral. The yarn is Noro Silk Garden in the two most neutral colorways available. The cream color is one of my all time favorite Noro colorways because it is almost the antithesis to the incredible colorways he is generally known for. The brown/black colorway was to add a little more interest to the sweater, although I debated about doing an all cream one with subtle stripes.

The body is finished and it worked up nice and easy from the top down. The tricky part is knowing exactly when to join the sweater under, what will essentially be, the underarm. It should be comfortable, not too tight under the armpit, but it's still kind of like diving into unknown waters and taking it on faith that it is going to work out. Trying to stay in the process, I reminded myself that I can always rip out a few rows if in fact it doesn't really work once I got further into the body. Being able to try on the sweater going from top down is another great advantage in getting the right fit.

Coming to the bottom of the sweater was a convergence of keeping my striping in mind, ribbing, the buttonhole placement and where to end the sweater. There was some anxiety as I negotiated all these factors but with a little bit of thinking things through and going with the flow I was satisfied with the results.

raglan sleeve
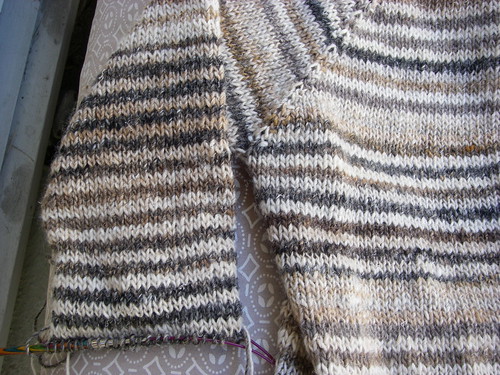
Now I am on the first sleeve. It seems to be taking so much longer than the body for some weird reason. The yarn is more easily tangling around one another and if you are familiar with Silk Garden it tends to stick to each other. Another cause of construction anxiety was the decreases. The pattern called for 10 decreases, every 5 rows, but I have spider monkey arms so I wondered whether to do the decreases every six rows or stop at 9 decreases. I went with the pattern and it seems to have worked out. It probably would have worked if I stopped at 9 decreases as well, but I have not finished the sleeve yet to make a sound assessment of it. Because of my long limbs it seems I have inches to go before I will bind off. When the time comes I am sure I will have another moment of anxiety in determining where exactly to bind of sleeve...at the wrist crease, a row or two beyond. Does anyone have an opinion on this? Please chime in if you have a preference. The 3/4 sleeve length, which I really like, was ruled out because I want this to be an all purpose sweater.

How often is it that there is only one project going on? Never. This means I have another cardigan on the needles. This one is Manu by Kate Davies. She is an amazing designer and you may be familiar with her Owls or Paper Dolls sweaters. This sweater is knit from the bottom up and is more complicated from the simple top down raglan sweater.
bottom up cardigan ex
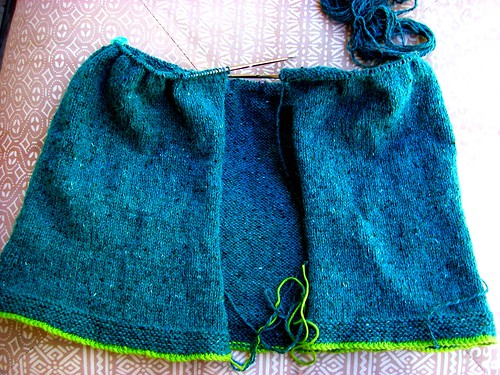
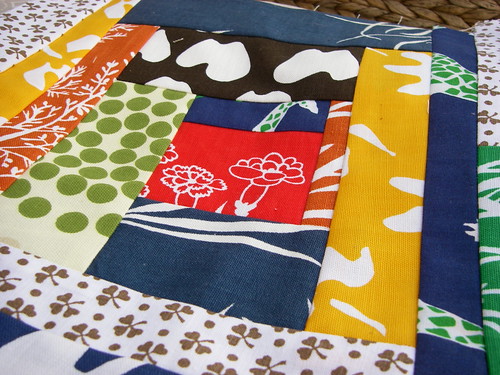
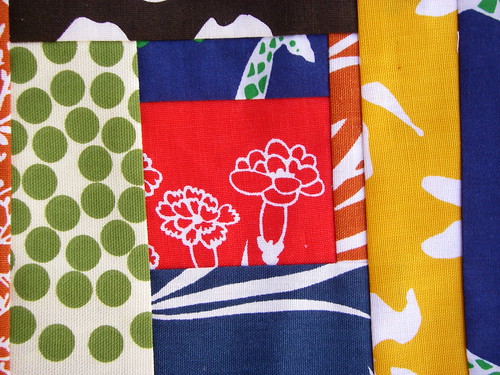
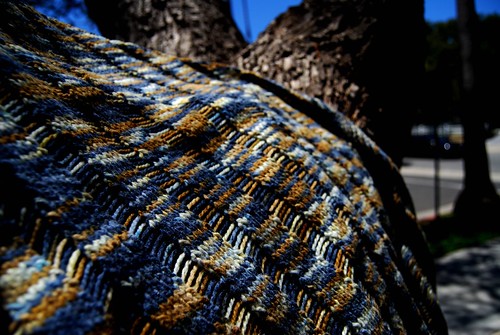
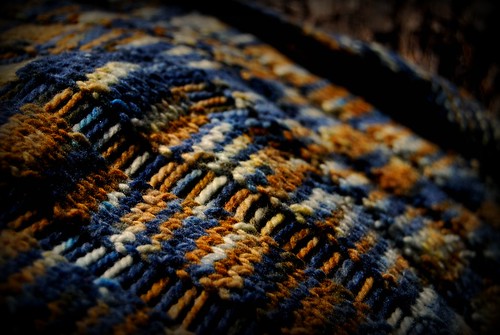
Now the problem with knitting from the bottom up is it takes some time to get to something more exciting than stockinette stitch in the pattern. There are about 4 more inches to knit before any pattern changes take place. The yarn is Rowan Felted Tweed and a beautiful teal blue. There just had to be some color in this process. But have you maybe seen these colors before?


Like maybe in the last post?
Stripey2
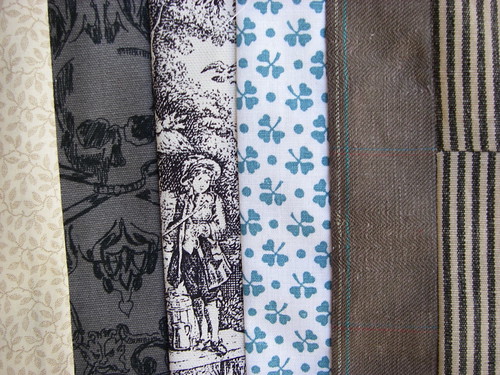
Coinkidink or not? I wasn't aware of it until I uploaded my pictures and saw all the photos next to each other. Anywhoo...

By giving myself a fresh start and a couple of projects to compare and contrast techniques has allowed me to focus and enjoy knitting again. I declare the knitting slump officially over and I am glad for it. (picture cartwheels & split leaps through grassy meadows & brilliant sunshine)

Now, back to sleeve length, any thoughts? Where do you stop your sleeves?

Friday, May 21, 2010

2 Squares

This morning I went to my first quilting class. It was taught by Ann Tilley at Hands-on 3rd and it was fantastic. For our practice square Ann had us do an impromptu log cabin using scraps from the studio basket. I grabbed a bunch of bold and colorful graphic prints and went to town.

log cabin 2


Log cabin 1
According to Ann, log cabin squares traditionally have red or yellow center squares which represent the heart of the home. With that tradition and symbolism in mind, I started with a red center. We also did foundational piecing and used a 12 x 12 piece of muslin to sew our fabrics on and helps to square up the piece when it is finished. I have not squared my squares up yet.


Ever the over-enthusiastic one, I did a vertical striped square in a more monochromatic palette of grays and blacks.
Stripey1
Really I just had to play with that skull fabric and toile. Although now I wish I hadn't put them side by side, however, it does produce a yang/yin effect with death and life side by side. Just a hint of blue to add a dash of color.


Stripey2
Quilting class was a damn skippy fantastical time. I feel my mojo coming back. The random nature of putting these squares together with what was at hand was so delicious and appealing to my sense of play. The next three classes will focus on putting these new skills together in creating a pot holder out of the practice square and the start of a baby quilt. This is exciting stuff, I tell ya.

Monday, May 17, 2010

Enlightenment

And now a few wise words from Puppetji


This provided a good belly laugh out loud morning start to my day. I hope it does the same for you.

Sunday, May 16, 2010

Sewing Mojo

My sewing mojo done got up and went about the time my sewing partner left town. Lately I have been feeling the call of the machine and projects have been dancing in my head. Recently, I went to a meeting of the Modern Quilt Guild and then over at Traveller's Yarn I stumbled on to this little kick in the pants.


sew12button

Chickpea Sewing Studio is offering a twelve step program for the weary sewist.

This is it.

For 12 months, 12 days a month, I will sew 1 for hour.

Twelve hours of sewing a month is a reasonable amount of time. The hubby is heading out of town for another week which means I can set up some kind of sewing situation around these parts.

This is just what I needed to get my mojo back.

There is a flickr group too.

How's your sewing mojo?

Friday, May 14, 2010

Ms. Green Jeans presents

This year we had grand plans for a veggie garden in our small patch of dirt in our small backyard. Sometimes grand plans have to be put on hold, especially when a long, short dog named Tank, needs emergency spinal surgery. If we can't buy tools and yards of lumber, then it is to the pots we go! On Wednesday morning, I stopped by the garden center and picked up a couple of pots and plants! First I spotted the perfect strawberry pot, which I was going to use as an herb garden. Then I found another pot, perfect for a tomato plant.

Yesterday morning, I got outside and potted. I love playing in the dirt. I love the mineral rich smell of the soil. The herbs smell so good and the tomato plants smell like tomato. The sun is shining, the roots are unwinding into new territory, everything is sparkly with water droplets...life is so amazing. From this puttering and potting around, we will have fresh bright edibles to enjoy in our meals and on our table.

Here's the run down of plants.

Herbs: basil, thyme, oregano, chives (onion and garlic), sage, trailing rosemary, and parsley

Veggies: Roma tomato, Golden Pear tomato, jalapeno pepper, banana pepper, and fennel

jalapenito ex

The jalapeno is already bearing fruit!


herb pot ex
The herb pot turned out perfect, except I bought way too many herbs and now I need another herb pot. You really cannot have too many fresh herbs. Plus I ran out of potting soil, so another trip to the garden center has to be made to finish planting.


pots in a row
It's looking mighty green out back.


Romas
Fresh tomatoes...Oh I cannot wait. But it will be mid-summer before I get any tomatoes.

to be planted
Here are my extra herbs & pear tomato plant. I have a pot for the tomatoes. Today I will pick up another pot for the herbs and more potting soil.


visitor
After giving everything a good drink of water, this fellow crawls out from under the deck. He sure surprised me. Gorgeous creature.


Maybe a month or more ago my mom gave me a whole bunch of cuttings from her succulents. Last year I had picked up a large bowl with succulents in mind. From her cuttings and a couple of extra plants I picked up I filled the entire bowl.

succulent bowl


up close


baby lemon
On the same day as the bowl, I planted a lemon tree. We are going to have so many lemons! Look at the baby lemon. So cute. I talk to the lemon tree most mornings while I stick my big snoot in to smell the blossoms. Yes, it is still blossoming. I better get my lemonade stand ready for business.


Grandma's pot ex
This little treasure was found in my Grandma's garage. Not too long ago it was filled with mosquito larvae from the collected rain water. Now it is filled with the leftover succulents from my mom.

new friends
An aloe vera breathing new life after being pot bound in a little pot. It has now been divided into two plants. The other two plants, well, I have no idea what they are, but if given the chance they will turn into tree size succulent plants. My neighbor has both on her hillside and they are huge!

Taking my cue from Ellen.

What's happening in your yard?

Thursday, May 13, 2010

She's Flies through the Air

With not so much ease.


Last night my friend, Darcy, and I went to join the circus. Really, we took and aerial fitness and conditioning class at the new Cirque School. We were raring to go. After a warm up of rolling around on one of those giant balls we did a circuit of silks, trapeze, ropes and floor exercises. Boy howdy...this was more of a workout than I anticipated.

It is core intense


Super core intense...core whore intense (as Darcy called it). You have got to work all those muscles to keep your balance.

It is also Lat- tastic.


I couldn't resist this image. It's so super hero cartoonish.
The lats are the muscles that pull you up on ropes and the trapeze and they are especially important in keeping your shoulder blades from ripping out of your body.

As Darcy and I were hanging side by side, by our knees, on the trapeze, the instructor asked us if we had done this before. We both exclaimed, not since monkeybars on the playground. Let me tell you, hanging as a full fledged adult rather than a 60-pound ten year old is a helluva lot of more pressure on the backs of the knees. I've got the bruises to prove it. It was much easier as a kid, but we did all right and even got to do a trick on the trapeze, which did not feel graceful nor did it probably look very graceful. Also, following directions with your ass over your head while hanging from a bar is more difficult than you would think.

The silks were fun and intimidating. Darcy was really able to pull herself up. It's all in the legs. We even did some kind of fetal wrap and hung parallel to the floor until gravity gently lowered us down.

In the end, we were sweating, our hands red and sore, a little ache in the wrists, muscles exhausted all over the body, and the backs of our knees bright pink. So what did we do...we signed up for more. It was so much fun.

Afterward, with hearty appetites, we chowed down Thai food and talked about how sore we would be tomorrow. But today, I am not as sore as I thought I would be. Lots of muscle fatigue but not too sore. I'll let you know how it goes next week and maybe try and get a picture or two.

Monday, May 10, 2010

My Giant Dusty Muffin

Well, I hope everyone got a chance to see Betty White host SNL this past weekend because she was a HOOT!

This of course brings me to a new recipe I tried this past week. Last week I attended my first meeting of the Los Angeles Modern Quilt Guild. For the meeting I baked up Apple Zucchini Muffins. These muffins are on the healthy side, with no butter or oil used in the recipe. They get their moistness from the yogurt, apple, and zucchini.

Apple Zucchini Muffin
from Moosewood Restaurant New Classics

yields 12 muffins
Prep Time: 20 minutes
Baking Time: 25 to 30 minutes

1 1/2 cups unbleached white flour
1/2 cup oat bran (substituted regular oatmeal for my muffins)
1 1/2 teaspoons baking powder
1/2 teaspoon baking soda
1/2 teaspoon ground cinnamon
1/4 teaspoon salt
2 eggs
3/4 cup plain nonfat yogurt
3/4 cup brown sugar, packed
1/2 teaspoon pure vanilla extract
1 cup grated zucchini
1 cup peeled, cored, and chopped apples

Preheat oven to 350 degrees. Place a paper liner in each cup of muffin tin.

In a bowl, whisk together flour, oat bran, baking powder, baking soda, cinnamon, and salt. Stir to mix evenly.

In a separate bowl, beat the eggs until pale yellow. Add the yogurt, brown sugar, and vanilla and beat until thoroughly mixed. With a spatula, fold in the zucchini and apples. Stir the wet ingredients into the dry ingredients until just blended.

Spoon about 1/3 cup of batter into each muffin cup. Bake for 15 minutes, rotate the muffin tin in the oven to ensure even baking, and continue to bake for another 10 to 15 minutes. When a paring knife inserted into a muffin comes out clean, the muffins are done.

Remove the muffins from the tin and place on a wire rack. Serve hot, warm, or at room temperature. Cool completely before storing in a sealed container.


Here's a sweet muffin shot
Apple-Zucchini Muff2

Saturday, May 08, 2010

Take a Picture

This past week, I had the good fortune to take a Photography Workshop with Gale Zucker. Gale is a super fab photographer who shot the photos in Shear Spirit. Shear Spirit is a great book that makes you want to chuck it all in and have an alpaca farm in some deeply green and hilly place and dye your handspun fibers in an antique bathtub, but I digress. Ellen, Ana, and I drove up to Santa Barbara for the day to the Loop & Leaf for the workshop on how to better photograph our fiber and knitwear.

This is my Crochet Scarf made from I Love This Wool yarn from the Hobby Lobby courtesy Miss Carla and the pattern is pure Ellen Bloom based on the building block of fashion...the granny square. Carla made the same scarf in a different colorway and I just had to do one too.


The workshop was amazing. Gale is just as fantastic a teacher as she is a photographer and gave us great information, tips, and tricks. Everyone seemed to be having a blast taking photos. I know I enjoyed every moment of the day.

The photos following are
Clapotis on a tree
Madeline Tosh yarn tone on tone
Loop and Leaf...a beautiful yarn store filled with lusciousness and friendly people.